- Community Home
- Knowledge Base
- How to use Marqeta Webhooks
- Subscribe to RSS Feed
- Mark as New
- Mark as Read
- Bookmark
- Subscribe
- Printer Friendly Page
- Report Inappropriate Content
- Subscribe to RSS Feed
- Mark as New
- Mark as Read
- Bookmark
- Subscribe
- Printer Friendly Page
- Report Inappropriate Content
on
09-14-2021
08:16 AM
- edited on
09-14-2022
09:22 AM
by
ColeCallahan
![]()
Are you building an application that relies on a third-party service? If so, how does your application know when updates occur on that service? Let’s say you have an application which manages a user’s social media account. How can the application know when new likes occur on that user’s account? What about when new friends are added or new messages are received?
One solution is to simply poll that service periodically. However, if you don’t poll frequently, your application data becomes stale. Polling too frequently can be computationally expensive (and that service might not even allow it).
The optimal solution is to use webhooks. Webhooks allow configuration of the third-party service so that when a given event occurs, the service will send information about that event to your application. Webhooks not only reduce load but also allow your application to update in real time.
Webhooks are an important part of Marqeta’s API offering. By taking advantage of Marqeta’s webhooks, you will keep your application’s data fresh and provide a richer experience for your users. In this article, we'll cover the distinctive features of Marqeta webhooks, and then we'll dive into an example that demonstrates how an application uses Marqeta webhooks.
The "What" and "Why" of Marqeta Webhooks
Marqeta webhooks allow developers to receive information about Marqeta API events. Much like push notifications on your phone, webhooks allow your application to be notified by the Marqeta API when certain events occur. For example, you can get notified whenever a transaction occurs, when a card is suspended, or even when a card PIN is changed. For more examples, check out the exhaustive list of event types.
With webhooks, your application can simply wait for an event notification to arrive. In response, your application can perform record maintenance or event processing. Webhooks reduce load on your system while simultaneously increasing your system’s data freshness.
Additionally, the Marqeta platform provides the following value-adds with their webhooks:
- Failed webhook notification messages will be retried, preventing data loss.
- Multiple notifications of the same event type will be batched together, reducing load on your system.
- Basic authentication headers can be included, allowing your system to authenticate the webhook notifications.
- Each program can support up to 5 active webhooks, allowing different listeners to be notified as needed
Now that we have an understanding of what Marqeta webhooks are and why they are useful, let’s look at how to use them.
The "How" of Marqeta Webhooks - a Walk-through
We’ll go through this tutorial in a few steps. First, let’s set up the necessary prerequisites. Then, we’ll test out the webhook functionality using a free Mockbin endpoint. Finally, we’ll spin up our own example Node.js application which receives this information and displays it on a simple page.
Set Up an Account
To begin, you’ll need to sign up for a Marqeta sandbox account. Go through the fairly standard account creation process.
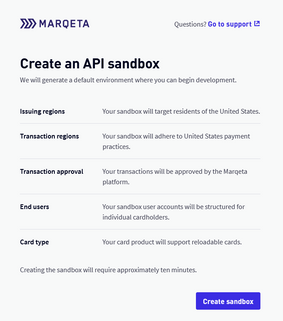
Sign in and set up two-step verification. You’ll be prompted to create an API sandbox. Click “Create sandbox."
Create a User
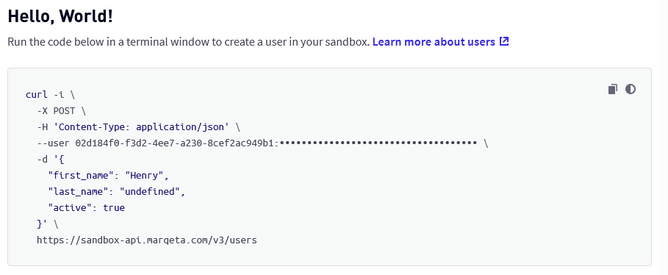
Once the sandbox is ready, you’ll then be given some guidance on creating a user via a curl command. If you’re on Windows, you can run the curl command using WSL, the Windows Subsystem for Linux.
Once you’ve run it, you should see a response like this:
Make note of the token value, as this is the user token that you will use in a later step. From here, you’re ready to get started!
Initial Webhook Testing with Mockbin
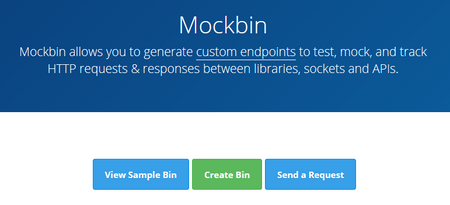
First, let’s set up an endpoint. We’ll use Mockbin to create an endpoint for testing. Head over there and click “Create Bin.”
You don’t need to mess with any of the settings. Just click “Create Bin” again.
You’ll then be sent to a URL with the format https://mockbin.org/bin/<BIN IDENTIFIER>/view.
The actual URL of your webhook endpoint will be https://mockbin.org/bin/<BIN IDENTIFIER>. You can also see the endpoint’s request history by going to https://mockbin.org/bin/<BIN IDENTIFIER>/log.
Register the Webhook
Now, let’s set up the webhook on Marqeta. You can do this by doing a POST to /webhooks. The easiest way to do this via the Core API Explorer. Head there, make sure to sign in, and scroll down to the webhooks section.
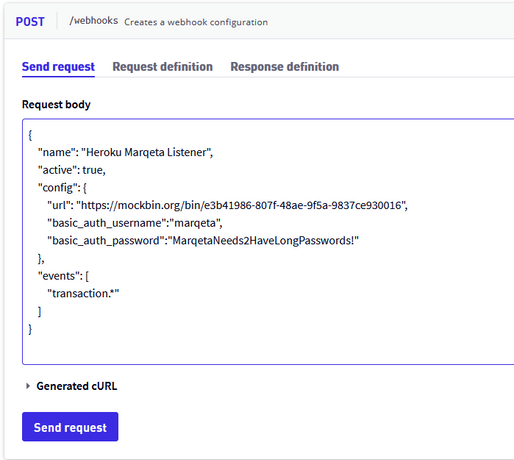
Open up the POST call and put in a body like below. This sets up the webhook to send notifications to our endpoint on all transaction-related events. Since our endpoint does not have authentication, the username and password don’t matter, except that the password must meet Marqeta’s password requirements.
{
  "name": "Heroku Marqeta Listener",
  "active": true,
  "config": {
    "url": "https://mockbin.org/bin/<BIN IDENTIFIER>",
    "basic_auth_username":"marqeta",
    "basic_auth_password":"MarqetaNeeds2HaveLongPasswords!"
  },
  "events": [
    "transaction.*"
  ]
}
Hit “Send request” to create the webhook.
Create a Card Product
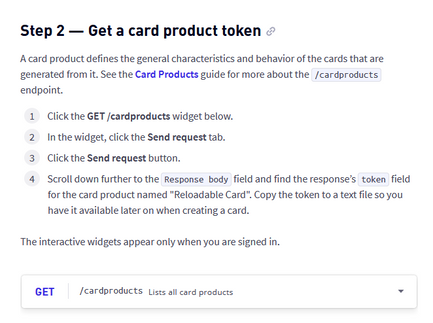
To test the webhook, we will simulate an authorization transaction, following the Core API Quick Start guide, starting from Step 2. But before we do that, there are a few resources we need to create.
Open the GET /cardproducts widget and hit “Send request.” You will get a response like the following:
Make note of the token value, as this is the card product token for the "reloadable card" product.
Create a Card
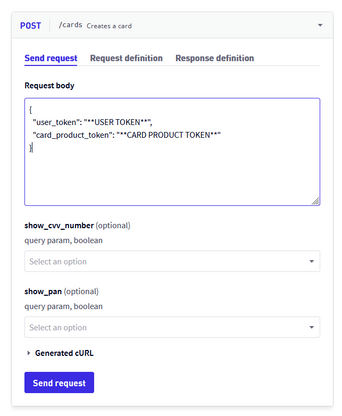
Next, scroll down and open up the POST /cards widget:
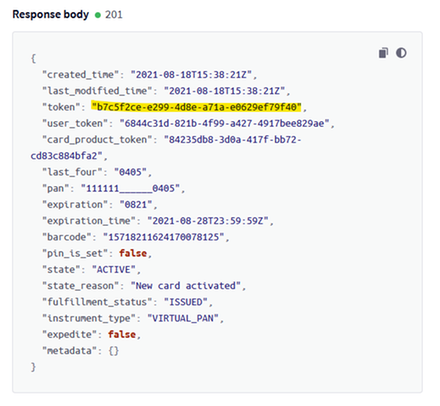
Fill in your user token and your card product token from the previous steps, and then send the request.
Again, make note of the token, which this time is your card token.
Simulate the Transaction
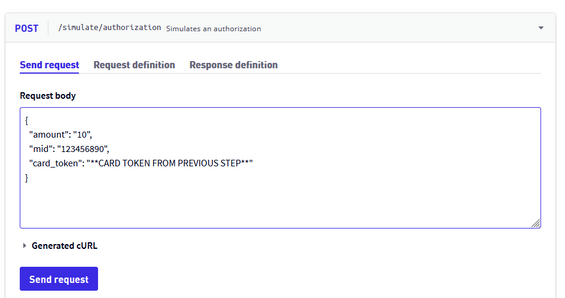
Finally, scroll down to “Step 3” of the Quick Start Guide and open the POST /simulate/authorization widget.
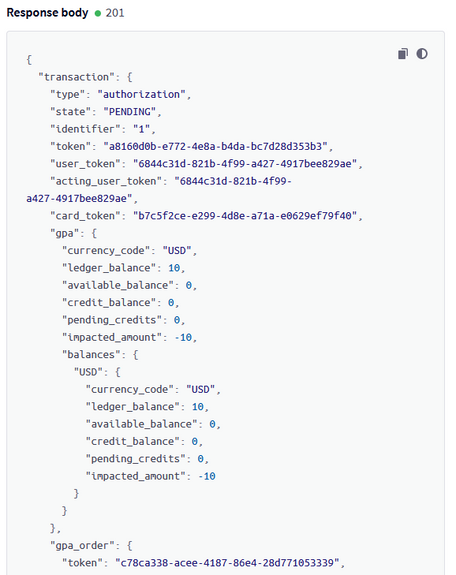
Fill in your card token and send that request along too. This request—which simulates a transaction authorization—will trigger the webhook notification. At that point, you should see a response like the following:
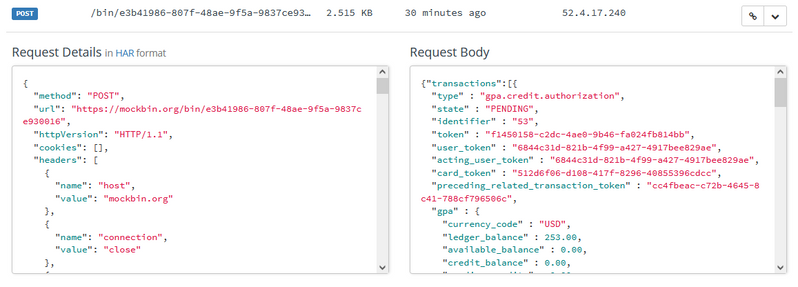
The Marqeta API, while responding to your request, also sent a notification to your configured webhook. Head over to https://mockbin.org/bin/<Bin Identifier>/log, where you should see an entry for a POST request like this:
As you can see, Marqeta successfully posted the webhook notification to your test endpoint.
Building Our Custom Webhook Listener
Now, let’s set up our own custom endpoint to handle these notifications. We’ll write our custom endpoint using Node.js, Express, and TypeScript. To follow along and write your own listener, you will need to have a standard JavaScript development environment with Node.js and NPM installed. Alternatively, you can simply fork the source code from https://github.com/henryjin3/marqeta-webhook-listener and skip to the Heroku deploy step below.
Initialize the Project
Ready to go? First, let’s create a new project in a new folder (ex. marqeta-webhook-listener) and run the following commands:
$ git init
$ npm init
$ npm i express
$ npm i -D typescript ts-node @types/node @types/express nodemon
$ npx tsc --init
Open up your package.json file and add some “scripts.”
"scripts": {
  "start": "node dist/app.js",
  "dev": "nodemon src/app.ts",
  "build": "tsc"
},
Build the Server
Create a new file at src/app.ts and add the following basic starter code:
import express, { Application, Request, Response } from 'express';

const app: Application = express();

const port = process.env.PORT || 3001;

app.get('/world', (req: Request, res: Response) => {
  res.send('Hello world');
});

app.listen(port, function () {
  console.log(`Listening on port ${port}`);
});
In your terminal in your project folder, run npm run dev. When you navigate to http://localhost:3001/world, you should see the “Hello world” page:
For deployment we’ll be using Heroku, which provides a quick and easy CD setup for applications like this. In the root directory, add a file called Procfile. This file tells Heroku how to run our application. The contents of this file should be a single line:
web: npm start
Commit and push these changes to your GitHub repository.
Deploy to Heroku
Now that we have something working, let’s go ahead and deploy it. First, sign up for an account with Heroku if you don’t have one. Once you’re in, create a new app. Connect it to your GitHub repo and enable automatic deployments. This is optional, but makes updating the app quick and easy.
Test Our Endpoint
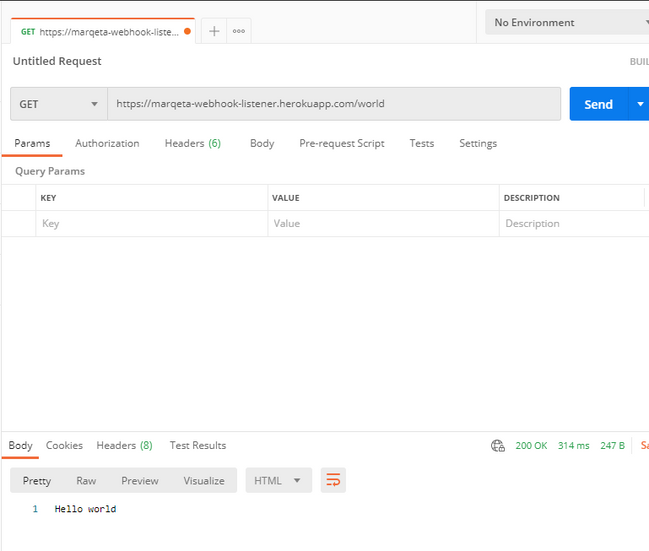
Once deployed, check out your new endpoint! Your URL will depend on your app name. For example, mine is https://marqeta-webhook-listener.herokuapp.com/world.
You can also use Postman to test the endpoint:
Update the Server to Store Notifications
Now, let’s head back into the code. We need a way to save notifications, so we’ll go ahead and save them into an array, which then gets saved to a file. While we’re doing that, let’s add some (hard-coded) basic authorization to the endpoint. In src/app.ts, let’s add a POST endpoint.
import fs from 'fs';

app.use(express.json());
const FILE = './db.json';

app.post('/marqeta', function (req: Request, res: Response) {
  console.log(`Post received`);

  //Authenticate for 'marqeta:MarqetaNeeds2HaveLongPasswords!'
  const authBuffer = Buffer.from(
    'marqeta:MarqetaNeeds2HaveLongPasswords!'
  ).toString('base64');
  if (req.headers.authorization !== `Basic ${authBuffer}`) {
    return res.status(401).send('Authentication required');
  }

  fs.readFile(FILE, function (err, data) {
    if (err) {
      return res.status(500).send(err);
    }

    //Get the old data and add in the new body
    const oldData = data.toString();
    const db = oldData ? JSON.parse(oldData) : [];
    const newDb = [...db, req.body];

    fs.writeFile(FILE, JSON.stringify(newDb), function (err) {
      if (err) {
        return res.status(500).send(err);
      }

      return res.send(`Request saved, current count: ${newDb.length}`);
    });
  });
});
Let’s now add a GET endpoint so we can see the results:
app.get('/marqeta', function (req: Request, res: Response) {
  fs.readFile(FILE, function (err, data) {
    if (err) {
      return res.status(500).send(err);
    }
    const dataString = data.toString();
    if (!dataString) {
      return res.status(204).send('empty file');
    }
    return res.send(JSON.parse(dataString));
  });
});
Your final app.ts file should look similar to this. When you’re ready, commit and push your code changes. Check Heroku to make sure that the auto deploy went smoothly.
Register Our New Webhook
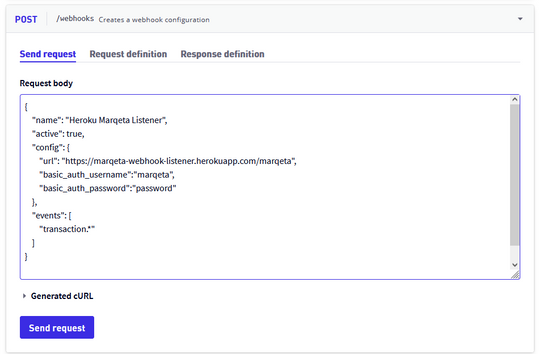
Finally, head back over to the Core API Explorer. Scroll down to the webhooks section. Let’s POST a new webhook:
{
  "name": "Heroku Marqeta Listener",
  "active": true,
  "config": {
    "url": "https://<MY APP URL>.herokuapp.com/marqeta",
    "basic_auth_username":"marqeta",
    "basic_auth_password":"MarqetaNeeds2HaveLongPasswords!"
  },
  "events": [
    "transaction.*"
  ]
}
The request should look similar to the following:
Simulate Transactions
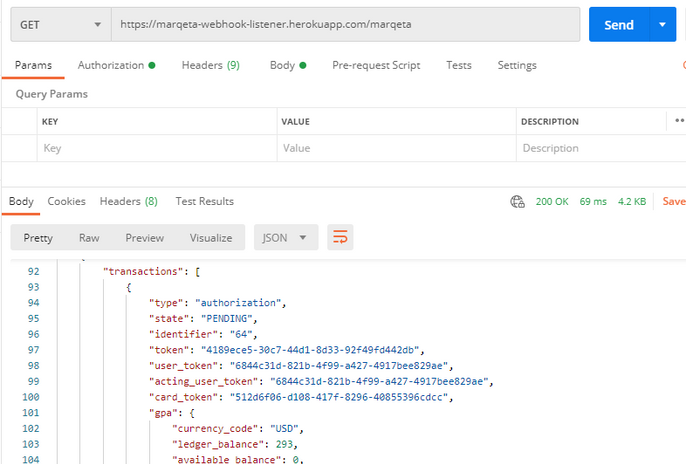
Once your webhook has been created, you can send another POST request to /simulate/authorization again, just like we did earlier. This time, your custom endpoint should have captured the incoming webhook notification. You should see the list of received webhook notifications when a GET request is sent to your custom endpoint:
That’s it! You’ve successfully set up a custom webhook listener and received a notification.
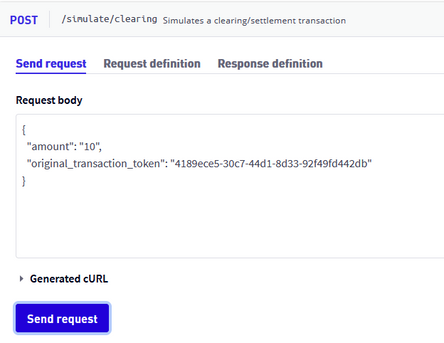
As you explore other API endpoints, you’ll see that any other transaction-related events will result in webhook notifications being sent to your custom endpoint. For example, let’s clear that transaction with a POST request to /simulate/clearing.
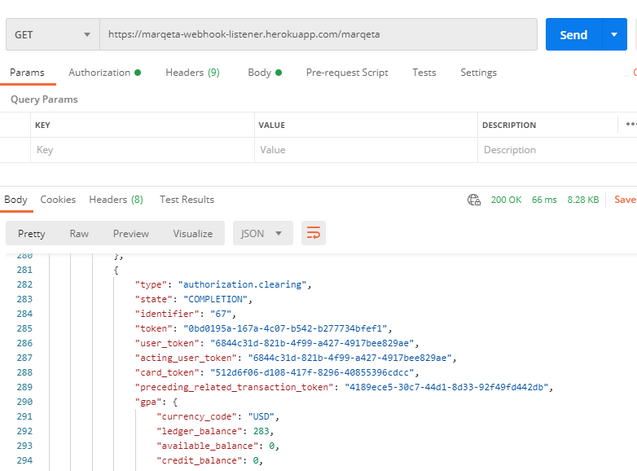
You should now see some more notifications listed at your custom endpoint. Send another GET request and scroll down:
Congratulations! You’ve successfully created a custom endpoint using Node.js, deployed it to Heroku, and received webhook notifications from Marqeta. With this, you have a great foundation to begin developing your custom integration with Marqeta.
Wrap-up
In this article, we covered why webhooks are helpful, especially as part of an application which uses the Marqeta platform. We covered the core features of Marqeta webhooks. We also walked through examples on how to set up webhooks within the Marqeta sandbox, including how to build a custom webhook listener using Node.js, Express, and TypeScript.
By using webhooks with the Marqeta platform, you can build an application that responds immediately to important events. This ensures your application data remains fresh and provides a rich user experience. Your business may have proprietary logic for processing payments, handling ATM transactions, or issuing cards. Webhooks allow your application to respond to those events in real time—immediately and gracefully.
Have something to add to this article? Become a contributor and help your fellow devs. Comment below and we'll review it.
Need more help? Ask below or in the forum, we're here to help.
